
3 Common Harley Chopper Mistakes (and How to Avoid Them)
The allure of the chopper is undeniable: a rebellious spirit forged in steel, a machine stripped bare to its raw essence, screaming individuality from every weld and hand-shaped curve.
But between the gleaming chrome, the impossibly stretched forks, and the thunderous roar lies a minefield of potential pitfalls.
Building a chopper isn’t just about aesthetics; it’s about engineering, understanding the delicate balance between form and function.
Too often, this balance tips, resulting in a rolling sculpture that’s more headache than head-turner.
Before you grab the grinder and torch, let’s delve into the three most common ways chopper dreams turn into mechanical nightmares, and how a little knowledge can save you a lot of grief (and potentially, a trip to the hospital).
We’re talking about avoiding the mistakes that separate the rideable rebels from the garage queens.
1. Neglecting Frame Geometry and Handling:
-
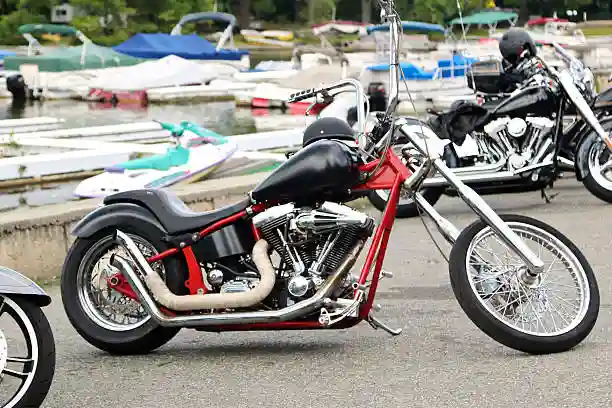
The Mistake: Prioritizing aesthetics far above handling. People go overboard stretching, raking, and slamming their frames without considering the consequences. This results in a bike that’s a nightmare to ride: unstable at speed, difficult to turn, prone to tank-slappers, and generally uncomfortable. Think massively extended forks with an excessive rake angle paired with a rigid frame. It looks cool parked, but sucks on the road.
-
Why it Matters: A chopper should be rideable. It’s not just a sculpture. Poor geometry makes it unsafe and unenjoyable, defeating the purpose of owning a motorcycle. Excessive rake makes the bike want to stay straight, fighting your attempts to steer. Stretching can weaken the frame if not done properly. Slamming (lowering) the bike to the extreme drastically reduces suspension travel, leading to a harsh ride and potential grounding issues.
-
How to Avoid It:
-
Do Your Research: Before you start cutting and welding, learn about frame geometry: rake, trail, wheelbase, and how these factors affect handling. There are countless articles and forums dedicated to this. Understand the trade-offs.
-
Respect the Limits: If you’re working with a modified stock frame, be mindful of the limitations of that frame. Significant changes should be done by a professional frame builder.
-
Consider a Reputable Frame Builder/Kit: If you’re going for extreme changes, seriously consider buying a pre-engineered frame from a reputable manufacturer. They’ve done the calculations and testing to ensure the geometry is sound, even with significant rake or stretch. Companies like Paughco, Led Sled Customs, or Santee (depending on the year/style) have been doing this for a long time.
-
Don’t Skip Suspension (Especially Rear): A hardtail looks cool, but your spine won’t thank you. If you must have a rigid frame, consider a sprung seat (but even that isn’t a substitute for actual rear suspension). A swingarm with even a small amount of travel makes a world of difference.
-
Think About Ride Height: How low is TOO low? Consider speed bumps, potholes, and leaning into turns. Low looks good, but practicality is important.
-
Get Expert Advice: Consult with experienced chopper builders or mechanics. They can offer valuable insights and prevent costly mistakes.
-
125 SSR Pit Bike: Specs, Performance, and Potential Issues
2. Overlooking Wiring and Electrical Systems – Harley Chopper Mistakes :
-
The Mistake: Hiding wires at the expense of functionality and reliability. People often strip out wiring unnecessarily, use undersized wires, make poor connections, and fail to protect the system from the elements. The goal is often “clean look,” but the result is often “constant electrical problems.”
-
Why it Matters: A faulty electrical system will leave you stranded. Choppers, by their nature, often involve significant wiring modifications. Eliminating essential components or creating shorts due to poor wiring will lead to headaches and potential safety hazards.
-
How to Avoid It – Harley Chopper Mistakes :
-
Plan Your Wiring Harness: Before you start cutting wires, map out your electrical system. Identify every component that needs power (lights, ignition, starter, charging system, etc.) and plan the wiring routes.
-
Use Quality Wire: Invest in automotive-grade, stranded copper wire of the appropriate gauge for each circuit. Don’t cheap out on this! Avoid solid-core wire, as it’s more prone to breakage from vibration.
-
Make Secure Connections: Use quality crimp connectors and terminals, properly crimped with the correct tool. Soldering connections in addition to crimping is ideal for added durability. Heat shrink tubing is essential for protecting connections from moisture and corrosion.
-
Protect Your Wires: Use wire loom or split conduit to protect the wiring harness from abrasion and heat. Route the wiring away from sharp edges and moving parts.
-
Keep it Simple, But Not Too Simple: While minimalism is a hallmark of choppers, don’t eliminate safety features like turn signals (especially if you plan to ride in traffic), a functioning horn, and properly bright lights.
-
Fuse Everything: Properly fuse all circuits. This will protect your electrical components from overloads and prevent fires.
-
Grounding is Key: Ensure a solid, clean ground connection between the frame, engine, and battery. Poor grounding is a common cause of electrical problems.
-
Consider an Aftermarket Wiring Harness/Module: Companies like Motogadget, Paughco, or even generic aftermarket options offer simplified wiring harnesses and electronic control modules (ECUs) that can streamline the wiring process and offer advanced features.
-
Test Everything! Use a multimeter to check for continuity, voltage, and shorts before you button everything up.
-
3. Sacrificing Reliability for Looks (Engine and Drivetrain):
-
The Mistake: Focusing solely on the engine’s appearance and neglecting its mechanical integrity. People often chrome everything, install questionable aftermarket parts, and fail to properly maintain the engine, transmission, and primary drive. The result? A beautiful bike that breaks down constantly.
-
Why it Matters: A chopper is meant to be ridden. If your engine isn’t reliable, you won’t be able to enjoy it. Furthermore, reliability is a safety issue. Nobody wants to be stranded on the side of the road due to a mechanical failure.
-
How to Avoid It:
-
Start with a Solid Foundation: Choose a reliable engine platform (Evolution, Twin Cam, Milwaukee Eight) depending on your budget and desired performance. A well-maintained stock engine is often more reliable than a heavily modified one built with questionable parts.
-
Don’t Skimp on Internals: If you’re modifying the engine, use high-quality components from reputable manufacturers (S&S Cycle, Andrews Products, etc.). Pay attention to tolerances and clearances.
-
Proper Assembly is Crucial: Engine assembly requires precision and attention to detail. If you’re not experienced, have a qualified mechanic assemble the engine. Use the correct torque specifications and lubricants.
-
Don’t Neglect Maintenance – Harley Chopper Mistakes :
-
Regularly check and change the oil, adjust the valves, and inspect the ignition system. Follow the manufacturer’s recommended maintenance schedule.
-
-
Choose the Right Carburetor/Fuel Injection System: Select a carburetor or fuel injection system that is properly sized for your engine and riding style. A poorly tuned carburetor can cause poor performance, fuel economy, and engine damage.
-
Don’t Over-Chrome Everything: While chrome looks great, it can also trap heat and make it difficult to inspect engine components. Use chrome selectively.
-
Pay Attention to the Transmission and Primary Drive: The transmission and primary drive are just as important as the engine. Use quality lubricants and inspect them regularly.
-
Proper Gearing: Consider your typical riding conditions and choose the correct gearing for your bike. Too tall of gearing will make the bike sluggish, while too short of gearing will cause the engine to rev too high.
-
Balance Style with Functionality: A suicide shifter may look cool but be dangerous. Jockey shift, foot clutch, and hand shift all require practice and familiarity, and it’s important to be brutally honest about your own skill and comfort level.
-
By avoiding these common mistakes, you can build a chopper that is not only visually stunning but also reliable, safe, and enjoyable to ride. Remember that building a chopper is a journey. Take your time, do your research, and don’t be afraid to ask for help from experienced builders.